


Table of contents
- Prerequisite
- Project Setup
- Creating A Home Page
- Creating The NFTCard() component
- Creating The Pagination Component
- Importing The NFTCard component
- Importing the Pagination Component
Accessing data has been a major aspect of web technology over time. Whether it is Web1,2 or 3. storing data and accessing this data that is stored has played a prominent role when building applications.
As blockchain technology evolves more data is stored on the blockchain, and querying the blockchain becomes more important. When building some decentralized applications on the blockchain, you will need to query data from the blockchain.
Querying data from the blockchain is one of the significant issues web3 developers struggle with.
In this tutorial, we are going to learn how to create an NFT Gallery using the Alchemy API to fetch NFTs that belong to a wallet address or collection.
Prerequisite
In this tutorial we will be using;
- Next.js
- Tailwind CSS - (for styling)
- Heroicons - (to add some beautiful icons.)
- Alchemy API - (For this, you will need an alchemy account)
Project Setup
To create an NFT gallery the first thing we have to do is to create a Next.js Boilerplate. In your terminal navigate to the folder on your PC you want to work in and run the command below;
npx create-next-app@latest
Then we navigate to the project folder we just created
cd nameofthefolder
Still in the terminal, run the commands below to Install Tailwind CSS for the styling.
npm install -D tailwindcss postcss autoprefixer
npx tailwindcss init -p
The next step is to open it up in our VSCode editor (you can build this project with any code editor you are comfortable with - for me I prefer VSCode). To do this we run the following command
code .
Now we have our project boilerplate all set up, we now test it to ensure everything works properly by running the following command.
npm run dev
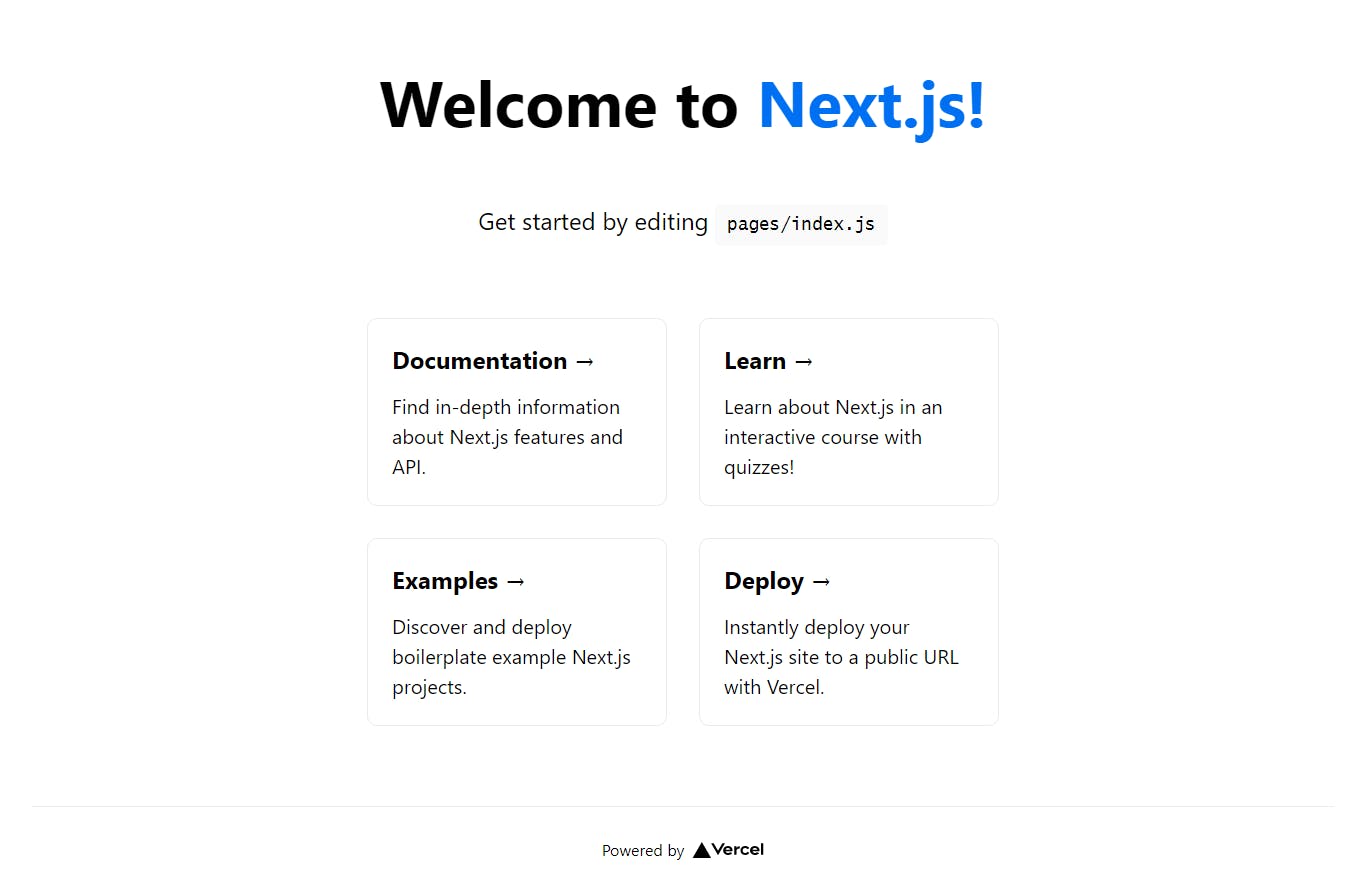
Your browser localhost:3000 will render the following page
Now we will make some changes to the styles folder in our project directory.
- In your code editor open up your styles folder
- Open up the
global.cssfile - Clear out the code in it and input the following code below
@tailwind base;
@tailwind components;
@tailwind utilities;
In the styles folder, delete the Home.module.css file - for this tutorial we are not going to be using this file.
Creating an Alchemy Account
- Login or Sign up to alchemy.com
- Click on the Create App button
- Add the app Name and Description
- For Chain select Ethereum
- For Network select Mainnet
- Then click the Create App submit button
- After that Click on the View Key button to see the
API_KEY. - Later in this tutorial, we will make use of it.
Selecting Ethereum will enable you to fetch NFTs only from the Ethereum mainnet.
If you want to fetch NFTs from a different chain, you can select the respective chain and also copy its API_KEY. When we create the fetchNFTs() function you should also change the baseURL to the respective chain you’ve chosen. E.g for the Polygon chain the URL would be:
https://polygon-mumbai.g.alchemy.com/v2/YOUR-API-KEY
Creating A Home Page
After the project is all set up and working properly, open up your code editor to make some changes to the files. In our index.js file, delete all the code inside of the main div tag.
Creating the basic project layout
Create a form tag inside the main div which will contain two input tags, a checkbox, and a button. Add the following code to your index.js file;
export default function Home() {
  return (
    <div className="font-poppins min-h-screen p-4 sm:p-6 bg-white dark:bg-black">
      <form className="max-w-lg mx-auto flex flex-col">
        <input type="text" placeholder="Add your wallet address" className="w-full mb-4 bg-transparent text-black py-2 px-3 rounded-md border border-darkgrey text-sm
"/>
        <input type="text" placeholder="Add the collection address" className="w-full mb-4 bg-transparent text-black py-2 px-3 rounded-md border border-darkgrey text-sm
" />
        <label className="flex justify-center items-center mb-4">
          <input type="checkbox" className="mr-2"/>
          Fetch for collection
        </label>
        <button
          className="text-white bg-gradient-to-r from-pink-500 via-red-500 to-yellow-500 px-4 py-2 rounded-md w-full transition-effect
          hover:text-white hover:bg-gradient-to-l from-pink-500 via-red-500 to-yellow-500
          border border-none font-semibold"
        >
          Get NFTs
        </button>
      </form>
    </div>
  )
}
From the code snippet above, we created;
- Two input tags will contain the wallet address and the collection address respectively.
- A checkbox which we will use to fetch NFTs belonging to a particular wallet address in a collection
- And a submit button
From the code above, we can see that we have already started adding the Tailwind CSS styling. This is how the basic structure of our NFT Gallery will be.
Creating variables to store addresses
Using the React useState() Hook, we will now create two variables to store the wallet and collection address.
import { useState } from "react";

export default function Home() {
  //variables that store collection and wallet address
  const [walletAddress, setWalletAddress] = useState("");
  const [collectionAddress, setCollectionAddress] = useState("");

  return (
    <div className="font-poppins min-h-screen p-4 sm:p-6 bg-white dark:bg-black">
      <form className="max-w-lg mx-auto flex flex-col">
        <input type="text" placeholder="Add your wallet address"
        className="w-full mb-4 bg-transparent text-black py-2 px-3 rounded-md border border-darkgrey text-sm
"
        onChange={(e) => {setWalletAddress(e.target.value);}}
        value={walletAddress}
        />
        <input type="text" placeholder="Add the collection address"
        className="w-full mb-4 bg-transparent text-black py-2 px-3 rounded-md border border-darkgrey text-sm
"
        onChange={(e) => {setCollectionAddress(e.target.value);}}
        value={collectionAddress}
        />
        <label className="flex justify-center items-center mb-4">
          <input type="checkbox" className="mr-2"/>
          Fetch for collection
        </label>
        <button
          className="text-white bg-gradient-to-r from-pink-500 via-red-500 to-yellow-500 px-4 py-2 rounded-md w-full transition-effect
          hover:text-white hover:bg-gradient-to-l from-pink-500 via-red-500 to-yellow-500
          border border-none font-semibold"
        >
          Get NFTs
        </button>
      </form>
    </div>
  )
}
From the code block above, we see that;
- First, we imported the react
useState()Hook from ‘react’ - Assigned the value of our wallet and collection variable to display their input.
- Then we created an onChange event handler that stores values of text input.
- The onChange event handler will run whenever we change the value in any of our input fields.
Check for Functionality
Now we need to check if this code is running exactly the way we want. To do this we need to use a chrome extension - React Developer Tool.
- Go to your browser extension store (for me I am using chrome)
- Search for React Developer Tools
- Then click on add to chrome
Once it is installed you take the following steps;
- Go to your browser (localhost:3000)
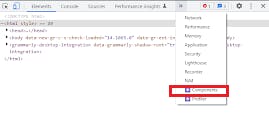
- Right-click on the page and click on inspect
- Click on the ‘>>’ symbol
- Then click on components
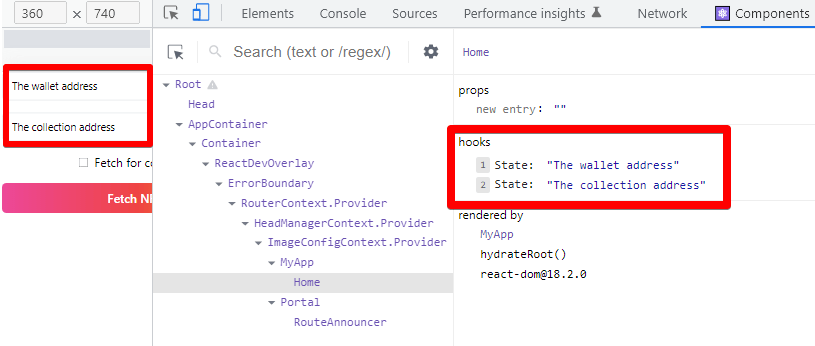
Once you click on components, you will be able to see all the components on the page, and the data added to the input tag.
Add Handler to the Button
To fetch NFTs from any address we need to add an onClick handler to the button, this will trigger the fetchNFTs() function when we create it. Use the code below;
<button
   className="text-white bg-gradient-to-r from-pink-500 via-red-500 to-yellow-500
   px-4 py-2 rounded-md w-full transition-effec hover:text-white
   hover:bg-gradient-to-l from-pink-500 via-red-500 to-yellow-500
   border border-none font-semibold"
   onClick={() => {}}
>
   Get NFTs
</button>
Create fetchNFTs() Function
Now we will create a function that fetches NFTs from a wallet address on the Ethereum chain using the getNFT endpoint of the Alchemy API.
The first thing we have to do is to create another useState() variable. In the index.js file, add the variable below;
const [NFTs, setNFTs] = useState([]);
Create the fetchNFTs() function, and add the code below in the index.js file
//Api key is stored globally because it is used in two separate functions.
const API_KEY = "ADD_YOUR_API_KEY_HERE";
    e.preventDefault();
const fetchNFTs = async (e) => {

    const baseURL = `https://eth-mainnet.alchemyapi.io/v2/${API_KEY}/getNFTs/`;
    const fetchURL = !collectionAddress
      ? `${baseURL}?owner=${walletAddress}`
      : `${baseURL}?owner=${walletAddress}&contractAddresses%5B%5D=${collectionAddress}`;

    try {
      const nfts = await fetch(fetchURL, {
        method: "GET",
      }).then((data) => data.json());

      if (nfts) {
        setNFTs(nfts.ownedNfts);
      }
    } catch (error) {
      console.log(error);
    }
  };
From the block of code above, you will notice that the first thing we did was to store our API key in a global variable API_KEY this is because we are going to call the API key in two separate functions, so it's best we store it this way, so we don’t repeat ourselves.
We created the FetchNFTs() function, which has an async keyword. The async keyword allows us to fetch data without blocking the entire application.
Inside the fetchNFTs() function create the baseURL which is composed by:
- Application base URL
- Your API key
- Owner address
- Collection address - optional
const baseURL = `https://eth-mainnet.alchemyapi.io/v2/${API_KEY}/getNFTs/`;
Next, we created a fetchURL variable which takes an if/else statement that checks if the collectionAddress variable is empty or not. If the collection address is provided, the API will filter the fetched NFTs by collection, else, the API will retrieve all the NFTs owned by the provided wallet address.
const fetchURL = !collectionAddress
      ? `${baseURL}?owner=${walletAddress}`
      : `${baseURL}?owner=${walletAddress}&contractAddresses%5B%5D=${collectionAddress}`;
We can observe that we have a 5B%5D string after the contractAddresses parameters. It implies that the contractAddresses parameter is an array, and we could filter by multiple contractAddresses.
We are also outputting the data in a JSON format so that the raw data can be easily understood.
Create the FetchNFTSForCollection() Function
This function enables you to fetch the NFTs contained in a particular collection address. We are going to add Pagination to this function. This is because API response returns only 100 tokens, most collections have more than 100 tokens that's why it is necessary to paginate the result.
First, we create another useState() variable in our index.js file
const [pageKeys, setPageKeys] = useState([""]);
Add the code below to your index.js file 👇
const fetchNFTsForCollection = async (e, startToken = "", pageIndex = 0) => {
    e.preventDefault();

    if (collectionAddress) {
      const baseURL = `https://eth-mainnet.alchemyapi.io/v2/${API_KEY}/getNFTsForCollection/`;
      const fetchURL = `${baseURL}?contractAddress=${collectionAddress}&withMetadata=true&startToken=${startToken}`;

      try {
        const nfts = await fetch(fetchURL, {
          method: "GET",
        }).then((data) => data.json());

        if (nfts) {
          if (nfts.nextToken) {
            setPageKeys((prevKeys) => {
              const newKeys = [...prevKeys];
              newKeys[pageIndex + 1] = nfts.nextToken;

              return newKeys;
            });
          }
          setNFTs(nfts.nfts);
        }
      } catch (error) {
        console.log(error);
      }
    }
  };
You can use the getNFTsforcollection endpoint by alchemy to fetch NFTs by collection, this endpoint requires three parameters;
- contractAddress [string] - contract address for the NFT collection you want to fetch
- withMetadata[boolean] - This specifies if we want to fetch the metadata (title, image, description, attribute) of the NFTs contained in the collection or only their IDs.
- startToken: [string] - an offset used for pagination.
Explaining the block of code above, what we did is;
- First, verify that the collection address is not empty
- Build the baseURL as we did in the FetchNFTs() function
- Build the fetchURL passing the collection address value as the contractAddress parameter, the withMetadata parameter to true, and the startToken offset for pagination.
- Then we use the try and catch error method to fetch() data and convert it to JSON format.
We can see that the fetchNFTsForCollection() function is similar to the FetchNFTs() function with few differences.
Create an onClickPage() Function for Pagination
This function would be used to navigate our page when the tokens fetched for a particular address are more than 100.
We create a useState() variable for currentPage in our index.js file
const [currentPage, setCurrentPage] = useState(0);
Add the block of code below to your index.js file
const onClickPage = (e, pageIndex) => {
    if (currentPage === pageIndex) return;

    try {
      fetchNFTsForCollection(e, pageKeys[pageIndex], pageIndex);
      setCurrentPage(pageIndex);
    } catch (error) {
      console.log(error);
    }
  };
Code explanation:
Inside the onClickPage() function we ran a condition that if the currentPage is equal to the pageIndex it should fetch NFTs from collection by running the fetchNFTsForCollection() function. We also stated that when this function is called it should start from the index page.
Activating the FetchNFTs() and FetchNFTsForCollection Functions
Create a new useState()variable to check if we want to fetch NFTs from a particular wallet address or collection. This variable will be handled by the checkbox we initially created in our return statement.
const [fetchForCollection, setFetchForCollection] = useState(false);
Add the block of code below to our return statement in the index.js file
<label className="flex justify-center items-center mb-4">
    <input
        type="checkbox"
        className="mr-2"
        onChange={(e) => {
           setFetchForCollection(e.target.checked);
        }}
        checked={fetchForCollection}></input>
          Fetch for collection
</label>
Explanation of the code block;
- Created an
onChange()handler that is triggered by the checkbox input tag - We targeted the value when checked using the “e.target.checked” value as the state input
- When checked we are fetching the NFTs from the collection, and when unchecked we are fetching from the wallet address.
Add Trigger to the button tag
Now we have to ensure the button can fire the right function based on our fetchForCollection variable:
return (
<div>
      <form className="max-w-lg mx-auto flex flex-col">
        <input
          type="text"
          placeholder="Add your wallet address"
          className="w-full mb-4 bg-transparent dark:bg-gray-800 text-black dark:text-white"
          onChange={(e) => {
            setWalletAddress(e.target.value);
          }}
          value={walletAddress}
          disabled={fetchForCollection}
        />
        <input
          type="text"
          placeholder="Add the collection address"
          className="w-full mb-4 bg-transparent dark:bg-gray-800 text-black dark:text-white"
          onChange={(e) => {
            setCollectionAddress(e.target.value);
          }}
          value={collectionAddress}
        />
        <label className="flex justify-center items-center mb-4">
          <input
            type="checkbox"
            className="mr-2"
            onChange={(e) => {
              setFetchForCollection(e.target.checked);
            }}
            checked={fetchForCollection}
          ></input>
          Fetch for collection
        </label>
        <button
          disabled={!walletAddress && !collectionAddress}
          onClick={collectionAddress ? fetchNFTsForCollection : fetchNFTs}
          className="disabled:bg-slate-500 disabled:border-slate-500 disabled:text-gray-50
          disabled:hover:text-gray-50 text-white bg-gradient-to-r from-pink-500 via-red-500 to-yellow-500
          px-4 py-2 rounded-md w-full transition-effect border border-none font-semibold"
        >
          Fetch NFTs
        </button>
      </form>
</div>
  );
}
Code Explanation;
- In the button tag, we added a condition to
onClickthat states that; - If there is a collection address then run the
fetchNFTsForCollection()function, if not, simplyfetchNFTs. - We also added a disable property to our button that disables the button when there is no wallet address or collection address inputted
- Also in our
setWalletAddressinput tag, we added a disable property that disables the input tag whenFetchForCollectionis true
Creating The NFTCard() component
- In our project directory, we will create a folder called components
- Inside the components folder, we will create the
NFTCard.jsfile
This is the file where we will structure what the output of our NFT token will look like. The NFT card will take an NFT as a prop, and also display its metadata.
Add the block of code below to our NFTCard.js file
export default function NFTCard({ nft }) {
  const splitGateway = nft.media[0].gateway.split(".");
  const fileType = splitGateway.slice(-1)[0];

  return (
    <div className="flex flex-col bg-gradient-to-r from-slate-900 via-purple-900 to-slate-900 rounded-xl overflow-hidden">
      <div>
        {fileType === "mp4" ? (
          <video loop autoPlay muted className="object-cover h-128 w-full">
            <source src={nft.media[0].gateway} type="video/mp4" />
          </video>
        ) : (
          <img className="object-cover h-128 w-full" src={nft.media[0].gateway}></img>
        )}
      </div>

      <div className="flex flex-col y-gap-2 px-2 py-3 rounded-b-md">
        <div className="mb-2">
          <h2 className="text-xl text-white font-bold mb-3">{nft.title}</h2>
          <p className="text-white">Id: {nft.id.tokenId}</p>
          <p className="text-white flex items-center">
            {`${nft.contract.address}`}{" "}
          </p>
        </div>
      </div>
    </div>
  );
}
Now Let’s understand the code in our NFTCard() function.
- First, we created a splitGateway and fileType variable which enables us to display both image and video NFTs in our project.
- Then in our return statement, we added some div tags to display different properties, which are;
- Media file - Image or video
- Token Id
- Title
- Contract address
View on Etherscan Button
Now it's time to add a button that enables us to view the NFT contract address and see more information about the NFT on Etherscan.
Add the code below to the return statement in our NFTCard.js file
<div className="my-3 flex justify-center items-center w-full">
   <a
      className="inline-block p-[2px] rounded-full
      bg-gradient-to-r from-pink-500 via-red-500 to-yellow-500
      hover:text-white active:text-opacity-75 focus:outline-none focus:ring"
      target="_blank"
      rel="noreferrer"
      href={`https://etherscan.io/token/${nft.contract.address}`}
  >
       <span
           className="block px-8 py-3 text-sm font-medium
           bg-white rounded-full hover:bg-transparent">
              View on Etherscan
       </span>
  </a>
</div>
Create the truncate() function.
The contract address and token address may be too long for the Card to contain, so we create a truncate function to help us shorten it and make the UI better.
Add the code below globally (before the NFTCard function) in our NFTCard.js file
const truncate = (str) => {
  if (str.length > 10) {
    return `${str.substring(0, 4)}...${str.substring(str.length - 4)}`;
  } else {
    return str;
  }
};
Now in the return statement of our NFTCard.js file add the following code to the tokenId and contract.address div tag.
<p className="text-white">Id: {truncate(nft.id.tokenId)}</p>
<p className="text-white flex items-center">
      {`${truncate(nft.contract.address)}`}{" "}
</p>
This will help shorten the token id and contract address to its first 4 letters and last 4 letters.
Create copyAddressToClipboard() Function
Here we want to create a function and attach a copy icon to it. The copy icon copies the wallet or collection address when clicked on.
First, we will install Heroicons in our main project directory
npm install @heroicons/react
Then we import the DocumentDuplicateIcon icon from Heroicon into the NFTCard.js file
import { DocumentDuplicateIcon } from "@heroicons/react/solid";
Add the code below inside the NFTCard() function in the NFTCard.js file
const copyAddressToClipboard = () => {
    navigator.clipboard.writeText(nft.contract.address);
    alert("Copied");
  };
The function above simply copies the NFT contract address when triggered.
Now we add the copy icon beside our NFT contract address, and also trigger the onClick() function that copies the NFT contract address to the clipboard when clicked on.
Add the code below to the return statement of the NFTCard.js file
<p className="text-white flex items-center">
    {`${truncate(nft.contract.address)}`}{" "}
    <DocumentDuplicateIcon
    className="h-4 pl-1 cursor-pointer"
    onClick={copyAddressToClipboard}
    />
 </p>
Creating The Pagination Component
This component is to structure the layout and function of the Pagination bar.
- In our components folder create another file called
Pagination.jsfile Then import the CheveronLeftIcon and CheveronRightIcon from Heroicon
import { ChevronLeftIcon, ChevronRightIcon } from "@heroicons/react/solid";Now we create the
PaginationBar()function and add the following code belowexport default function PaginationBar({ currentPage, pageKeys, onClickPage, className = "" }) { return ( <div className={`px-4 py-3 flex items-center justify-center border-gray-200 sm:px-6 mt-10 ${className}`} > <div> <nav className="relative z-0 inline-flex rounded-md shadow-sm -space-x-px" aria-label="Pagination" > <button onClick={(e) => onClickPage(e, currentPage - 1)} disabled={currentPage === 0} className="disabled:bg-gray-300 relative inline-flex items-center px-2 py-2 rounded-l-md border border-gray-300 bg-white text-sm font-medium text-gray-500 hover:bg-gray-50" > <ChevronLeftIcon className="h-5 w-5" aria-hidden="true" /> </button> {pageKeys.map((page, i) => { if (currentPage === i) { return ( <button key={page} onClick={(e) => onClickPage(e, i)} aria-current="page" className="z-10 bg-indigo-50 border-indigo-500 text-indigo-600 relative inline-flex items-center px-4 py-2 border text-sm font-medium cursor-pointer" > {i + 1} </button> ); } else { return ( <button key={page} onClick={(e) => onClickPage(e, i)} className="bg-white border-gray-300 text-gray-500 hover:bg-gray-50 relative inline-flex items-center px-4 py-2 border text-sm font-medium cursor-pointer" > {i + 1} </button> ); } })} <button onClick={(e) => onClickPage(e, currentPage + 1)} disabled={!pageKeys[currentPage + 1]} className="disabled:bg-gray-300 relative inline-flex items-center px-2 py-2 rounded-r-md border border-gray-300 bg-white text-sm font-medium text-gray-500 hover:bg-gray-50" > <ChevronRightIcon className="h-5 w-5" aria-hidden="true" /> </button> </nav> </div> </div> ); }In the code above we created a
PaginationBar()Function that took some props which are;currentPage- This is a variable in ourindex.jsfile, that contains the current page we are viewingpageKeys- This displays the number of pagesonClickPage-This is a function we created in ourindex.js file, that enables us to navigate to the next page.- And return a set of div tags that helped style and structure the display layout of our pagination bar.
Importing The NFTCard component
To be able to view a component that we created in the frontend of our application we have to import it into our index.js file.
Now we will go to our index.js file, and import the NFTCard() component that we created into our index.js file
Add the code below to the top of our index.js file
import NFTCard from "../components/NFTCard";
In the return statement of our index.js file add the code below where you want the NFTCard() to be displayed.
<div className="grid grid-cols-3 gap-8 mt-6">
        {!!NFTs.length &&
          NFTs.map((nft, i) => {
            return <NFTCard nft={nft} key={`${nft.tokenUri.raw}-${i}-${nft.id.tokenId}`}></NFTCard>;
          })}
</div>
In the code above, we used the map function to iterate over the array of NFTs and return an NFTCard for every NFT, passing the NFT itself as a prop of the NFTCard.
Importing the Pagination Component
Now in our index.js file, we import the PaginationBar() function, to enable us to display our pagination bar in the front-end of our Dapp.
Add the code below to the top of our index.js file
import PaginationBar from "../components/Pagination";
Next, we add the pagination bar to our return statement. Add the following code to where you want the pagination bar to appear in your Dapp.
{pageKeys.length > 1 && (
        <PaginationBar
          currentPage={currentPage}
          pageKeys={pageKeys}
          onClickPage={onClickPage}
          className="border-t"
        />
      )}
Now we have come to the end of our tutorial, this is how your NFT Gallery should be looking.
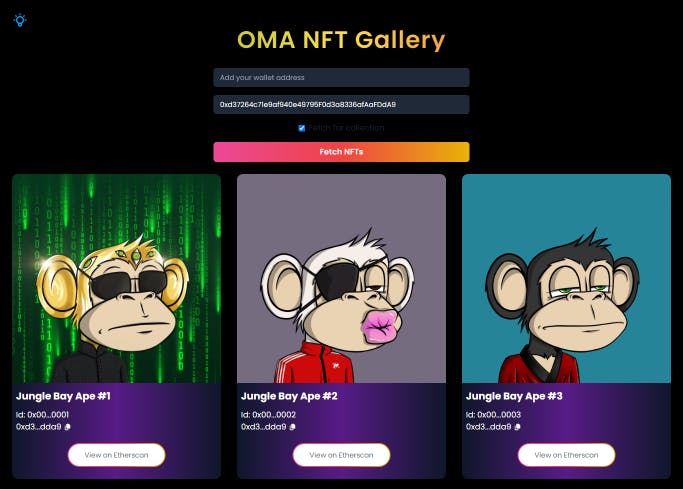
If you have come this far, you deserve applause. So pat yourself on the back, and enjoy a slice of pizza, Because you just built an NFT Gallery from scratch yay!🚀🚀🚀